Showing posts with label products. Show all posts

2014 Seattle RV Show in Seahawks Territory


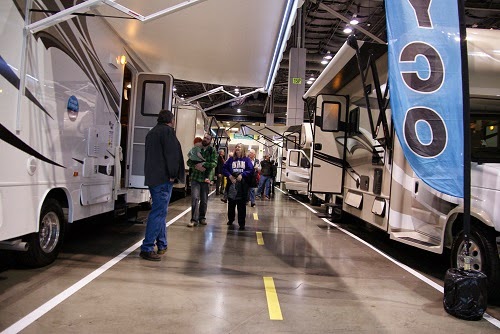
On Saturday I made a run over to Seattle to the annual Seattle RV Show. Just days after an estimated 700 thousand Seahawks fans converged on the city for the Super Bowl victory ceremony, Centurylink Field was hosting the 2014 Seattle RV Show


I could still feel the Seahawks fever in the air. Some dealers were even offering Super Bowl specials. Here are some highlights from my RV show adventure:


After sleeping in, I took the ferry from Bainbridge Island over to Seattle. It was below freezing outside but a beautiful day. I couldn't resist spending the 30 minute ride outside taking pictures and shooting some video while the rest of the passengers remained inside staying warm.

A look ahead at Seattle and the Cascade Mountains

Looking back at Bainbridge Island and the Olympic Mountains
When I arrived at Centurylink field, I payed my $12 for a ticket and started my journey through the many, many, many RVs, trailers, campers, and RV stuff. There were so many RVs this year in multiple rooms, that I found it very difficult to get my bearings at first. I tossed the show map I was given at the door because I didn't think I'd need it. Turns out I needed it several times. After a while I figured out the lay of the land and started touring rigs...one section at a time.  Check out my video for a recap.

I also picked a couple seminars to attend. My favorite was the show director himself sharing tips on boondocking. I learned a few things that got me excited to come home and plan a boondocking adventure of my own. I'll have to put some of those tips together in a future post. Keep an eye out for that.

The show organizers promised a "Bigger and Better" show this year and they certainly delivered. I couldn't even see everything. After about five hours I was exhausted. It was time to head back to the ferry before darkness set in.

If you are in the market to buy, I recommend attending an RV show near you. You will be able to comparison shop and tour many RVs under one roof. As a bonus, most dealers offer RV show discount pricing. So save yourself the headache, time and gas driving all over the place to find the right RV for you. Go to an RV show first. You'll enjoy it.

Have you attended an RV show this year? What was your favorite RV?

Read full article »

2014 RV Show - Coming to a City Near You


February is the month most RV shows come to town. Whether you are in the market for a shiny new RV or just want to see what products are hot in 2014, an RV show is the best place to see it all under one roof. Many shows also host seminars with industry experts on a variety of hot RV topics including my favorites...solar power and boondocking.


The RV industry has taken a big beating in sales in the last four years. If you've attended an RV show lately, you may have noticed the abundance of used travel trailers and RVs and the absence of high-end rigs. I noted this in my last RV Show video.


A look back at a past Seattle RV Show

Lately, the word on the street is that the RV industry is starting to bounce back and I'm sure that will be reflected in RV shows this year. The Seattle RV Show promises to be "Bigger and Better Than Ever.


Eight cities, including Seattle, are hosting RV shows this weekend. The rest will host events throughout February and March. So why not drag the family out and check out the latest motorhomes, travel trailers and RV products.

UPDATE!
I'm back. The Seattle RV Show was huge and packed full of cool stuff! Read more about my visit and check out the video.

Read full article »

Money Saving Apps for RVers


The RV lifestyle seems simple and inexpensive from an outside perspective, but it can be difficult to keep expenses down between food, gas, and parking. These apps are designed to help travelers find ways to save money on the road.

Gas Buddy for iPhone and Android is a free app designed to help you find the cheapest gas prices in the area. This app will show you all of the local gas stations with their per-gallon rate, as well as their distance from you. Gas prices generally only vary by $.02-$.20 so the savings don’t always seem drastic, but when you regularly venture hundreds of miles it can really add up.

This app depends on drivers to report gas prices, and there are prizes and points for reporting the cost of gas when you fill up. There are some inaccuracies and it does not cover all gas stations in all areas, but it’s worth a try if you spend a substantial amount of time traveling in an RV (or even just for a min-road trip).

If you are looking for places to camp, Passport America for iPhone or Android is a free app for finding campgrounds and getting discounted nightly rates. You can search by park or area to find prices, amenities, and contact info.

Passport America Search
Some people prefer to save money by spending the night in parking lots or other free public areas, but if you are in a less RV-friendly area or are looking for a place to stay a while, you will find 50% discounts at participating stops. 

Allstays Truck Stops and Travel Plazas for iPhone or Android ($9.99) is another great one for finding stops along your journey. It is designed for truck drivers, but can be equally useful for RV travel. It will show you big stops like Flying J, Love’s, and TA Travel Centers.

All Stays iPad Screenshot
You can filter searches for specific amenities like a particular brand, or ATM or UPS stops to make it useful to what you are looking for. It also works when your phone is out of service range.
If you are looking to use free overnight parking it can also help you identify places that allow truck and RV parking so that you can avoid camping fees.


There are also endless apps useful for purposes such as navigation, weather updates, world news, and entertainment. If you are traveling with kids you can load up your phone or tablet with games and puzzles, or if you want to keep up-to-date with what’s going on in your hometown, most regional newspapers have mobile apps as well. Smartphone data plans can be costly, so make sure that you are getting the full benefits that they provide.

Andi Singer is a blogger for www.yourrvconnection.com, a Jayco dealership based out of Indiana, and former cellphone salesperson. She regularly travels around the Northern United States and is always on the lookout for ways to save money.

Read full article »

LED Light Bulb Comparison


Walk through the light bulb section of Home Depot these days and you're likely to see more LED replacement bulbs for your home lighting fixtures. Though expensive, the claims are that they use very little electricity and that you'll probably never need to replace them. So let's see. 
The Battle of the Bulb
Most of us already know that LED bulbs use much less electricity than traditional bulbs and that they last forever. I wanted to run my own test. I decided to replace the bulbs in my RV light fixtures with LEDs. During that project I ran this comparison to see exactly how much more efficient my LED replacement bulbs were over the original incandescent bulbs.


Are you thinking of replacing your bulbs with LED bulbs? Event if you just replace a few, it's probably worth the expense and it's very easy to do. I picked up my bulbs from Amazon. Here are some quick links (below) if you want to check them out for yourself.


I used this 9 LED bulb in my RV for about $7 each (I needed about 16 of them).


I later found these that come in a 2 pack for around $12.

If you try this out on your RV, leave a comment. Do you like the result? How much power do you think you've saved?

Read full article »

RV up in the air


It was pretty strange seeing my RV up in the air like this. I had it in the shop for an oil change and brake inspection.

I also had some wear on the inner tread of my front tires. I was told that it was probably due to the front end compressing a lot (basically bouncing up and down). The strange part was that the wear was only on the inner most tread. The others were perfect. I thought I would have to replace the front tires. Instead, they rotated them to the inner rear dual.

I ordered front and rear Hellwig Anti Sway bars tonight online along with four heavy duty Bilstein shocks. I think I saved about $500 to $600 bucks over what the RV shop was going to charge. I'm so excited to get those put on. It should be a totally different ride.

The RV guy wanted $450 to install the sway bars, so I'm going to try and install them myself (perhaps with a little help from my son). I've watched a couple of YouTube videos about it and I think I can handle it. Several guys on the RV.Net forums say they've installed them without much trouble. I'll have to have the shocks done at the shop since I have no way to jack up the RV and remove the tires. Maybe it can be done without jacking it up, but I don't think so. Bummer.

I'll keep you posted on my progress once the sway bars and shocks come in the mail.

~T
Read full article »

Triple Your RV Storage with Space Bag!


The folks at Space Bag asked if I would be interested in trying out their dual use bags in my RV. I've heard of Space Bag before, but have never given them a try. My RV has limited storage space for bulky items like extra pillows, blankets, towels and clothes. So I anxiously agreed to put Space Bag to the test and do what I do best...tell you what I think.

Giveaway
Win a FREE set of SPACE BAG Dual Use Bags

When the complimentary set of Dual Use Space Bags arrived in the mail, my wife and I were pretty excited. The box had a set of nine Space Bags ranging from small to extra large. I learned that the Dual Use bags didn't even need a vacuum cleaner to compress. This meant that I could squish or roll them by hand, which works just about as good as the vacuum in most cases.

I took my new Space Bags out to the RV and did this review:


The pack also came with a handy storage bag to neatly store your compressed stuff.

Storage Bag

The Final Assessment
Overall, I'd say Space Bag performed as advertised. In fact, they were pretty fun to use. The whole family actually watched as I squished my first pillow into a Space Bag. Yup, it was pretty exciting.

Space Bag is an intuitive and effective system. I simply pick the right sized bag, stuff, seal, open the flap, squeeze or suck with vacuum, close flap, and store. If you are an I-gotta-read-the-instructions-before-I-use kind of person, then you'll be glad to know that the included instructions were pretty easy to follow.

Once compressed, the bags did not leak. They're made with durable, but not indestructible, plastic. So I'm sure they would puncture or tear if you poked or scraped them with something sharp. I recommend using the storage bag seen in the picture above to keep your bags neatly stored.

This product is a keeper. I really liked these bags and will continue to use them. Of course there are other uses for Space Bags beyond what I tried. In fact, I took two of the small left over bags and stashed them in my carry on luggage. I can't wait to stuff some clothes in them on my next trip.

So pick up a set try them out for yourself!

Giveaway!!!
I'm having a giveaway for a Free Set of Space Bags. All you have to do is "Like" me on Facebook. For rules and full details click here. Good luck!

Additional Space Bag Info
Product Info | Purchase Space Bags | Facebook | Twitter

Read full article »

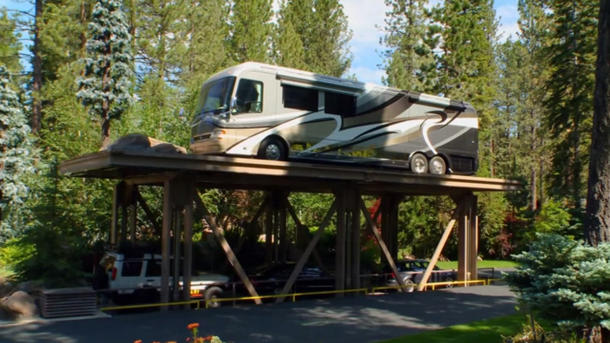
Multi-Million Dollar RV Elevator


If you think this RV elevator is over the top. Just wait until you see what is underground.


Software magnate Tom Gonzales' upstairs garage holds his collection of Harley-Davidson special edition motorcycles, most of which have never been started, much less driven. This aircraft carrier quality lift costs $25-per-button push cost in electricity, but that's just the tip of the iceberg.

Just ride the lift down underground and see where he parks his 45 foot RV and other vehicles. Watch this video for the full tour. It is pretty darn amazing.


Read full article »

Roadmaster Towing - Made In America


My Towing Setup
Do you tow a vehicle behind your RV? If so, then you are certainly familiar with Roadmaster Towing products. I have a Roadmaster Sterling tow bar and Roadmaster Even Brake assisted braking system. I have to say that the quality of both components is very high.

In this video, go behind the scenes at Roadmaster Towing in Vancouver, Washington and see their state-of-the-art manufacturing process. It was impressive.


I didn't know that Roadmaster Towing is based here in Washington State. I also got a warm feeling knowing that I'm relying on quality products that are made right here in the U.S.A.

Here's how I hookup and tow my car behind my RV.

Happy RVing!
Read full article »

Winegard's RoadStar 3000, a powerful new compact omnidirectional antenna


Can I finally retire my Winegard batwing antenna? Except for holding up my WiFi extender antenna, I don't use it much. Once the switch to digital TV came, I stopped watching regular TV in my RV. So perhaps the time has come to take down the old antenna and replace it with Winegard's new RoadStar 3000 compact omnidirectional TV antenna.

According to the press release:


The antenna is designed to continuously find and pull in all available VHF, UHF and FM broadcast signals within a 35-mile radius of a parked RV. The RoadStar 3000 delivers free local standard and HDTV programming from ABC, CBS, NBC and FOX plus many additional sub-channels that carry 24-hour news, weather, music, kids programming and movies.

The 3000 series eliminates the need to manually aim and lock onto digital signals. Also included are a 12-volt DC power supply and receptacle, and a two-way splitter for a second TV and optional cable input. At only 7.56 inches high by 14.88 inches in diameter, the low-profile RoadStar 3000 offers superior wind resistance while occupying minimal roof space.

Well...It's powerful, has HD and looks nice. I'm sold. How much is it? Don't know yet. Stay tuned (pun intended). 

Want to read more? Visit the Winegard RoadStar website.

Read full article »

I don't have an RV garage, I have an RV cover


Do you keep your RV in the garage? If you do, then that's pretty cool. I, on the other hand, don't have a roof over my RV. So the best way I've found to keep my RV protected from the elements is to keep it covered with a quality RV cover.

I was recently asked by Empire Covers to review their new RV cover. Within a week I received the cover at my door. The first thing I noticed was that it was smaller and lighter than expected. Some covers can be bulky and hard to handle, but not this one. This got me excited to unpack it and try it out.

February 2012
Win a FREE RV Cover from EmpireCovers.com

Check out the video below for my review:


Pros
I've used the cover for a couple of weeks now and I have to say that I really like it and would recommend it for your RV. Here's why:
Reflectors on the front/back
  • It fits my RV better than my previous cover
  • It's light and compact which makes it easy to store and handle (about 1/2 the bulk of my other cover)
  • The elastic in the front and rear hold it in place right away without having to tie it down
  • Installation and removal is easy which means I can put it on more often
  • It has yellow reflectors sewn into the front and rear to keep your guests (or kids) from driving into it at night
  • And, it comes with a 5 year warranty. 
Cons
I couldn't find anything negative to say about the cover itself. The only marginal feedback I would have has to do with the installation instructions. It comes with one piece of paper that includes the warranty and instructions. The instructions are clearly for the car cover they sell and not the RV cover. With that said, it is pretty easy to figure out once you've unpacked it (as seen in the video).

Tip for removing, storing and installing your RV cover
To remove the cover from your RV, start by lifting up the back and sides, fold them towards the middle, and continue folding from the outside in until the cover is the width of the storage bag. Then start folding (or rolling) towards the front of the roof before putting the cover in the bag. If you do this, then installation is easy. To re-install the cover, just place it on the front of your roof and unroll it towards the back and drop the sides. 

My RV Cover quick tips

  • Wash your RV before you cover it, because it's always nice to unwrap a nice shiny RV
  • If possible, wait until it is dry before you cover your RV
  • Remove or cover any sharp objects on your roof or sides such as solar panels, antennas, etc.
  • It's much easier to tie a rope to the bag and lift it up to the roof instead of trying to carry it up the ladder with one hand
  • When walking around the roof during the installation, be careful where you step
  • You can start your RV's engine or run your generator when covered, but make sure the cover is not covering or near any exhaust pipes
  • If you run your gas heater, be sure the cover is not covering the hot air heater vent as it will burn a hole through your new cover
  • Finally, make sure you unzip any necessary side panels before expanding any slides.
So there you have it. Keep your RV looking as good as new with a new RV cover. It is worth the investment and a "must have" for me.

To find an RV cover designed for your RV, I recommend you visit EmpireCovers.com first.

Read full article »

RV Suspension Upgrade Part 2 - Installing Rear Anti Sway Bars and Bilstein Shocks


Back in May I started a project to upgrade the suspension on my Class-C motor home. I purchased heavy duty upgraded anti-sway bars from Hellwig and replacement Bilstein shocks. I decided to do the anti-sway bar installation myself and managed to get it done without doing any damage to myself or my RV. Did you see my post from May? If not, here's a link.

In part one I covered the replacement of my front anti-sway bars. My plan was to shortly follow that up with "Part II" of the series that would cover the replacement of the rear anti-sway bars. If you have been following my blog, then you know that didn't happen. As it turns out, I finished the project a couple of months ago but haven't had the time to tell you about it. Truth be known, I just haven't had the time to edit the video and post it to YouTube. Why? Well here's my excuse. This year, I decided to run a marathon and, frankly, the training is "taking over my life!" But hey, two months later...I've finally finished the video!


I'm so glad I did this install, and the results have been remarkable. Unless you are the driver of your RV, it's hard to explain the difference the upgrade makes. Before...when the RV handling was not good...I would have to remain calm and collected behind the wheel in order not to alarm the rest of my family. While my family continued to enjoy the ride, I might be "white knuckling" it a bit as cross winds toss the RV around, or semi-trucks go speeding by, or while uneven roads cause the RV to shift from side to side. This suspension upgrade minimizes much of that affect and has changed the whole RV driving experience for me. As if I didn't enjoy driving the RV before...now it's much more relaxing.

For details on what I did, check out part 1 and part 2 of the videos I put together. 

Finally, here are some links to the vendors I utilized for the upgrade:
If you're planning on keeping your RV for a while, then I highly recommend this upgrade. It's worth the investment and you'll feel safer and more in control behind the wheel. 

~Tito

Read full article »

The Magellan Roadmate Pro9165T GPS - A GPS made for RVers


It isn't often that I'll promote a new gadget that I haven't tried out yet, but this GPS may be the exception. If you are a Good Sam Club member like me and prefer parks with favorable Good Sam ratings, then this new GPS may be for you.


Magellan, Trailer Life Directory, and Good Sam Club have teamed up to produce the all-new RoadMate Pro 9165T, a GPS device that was designed specifically for RVers.

An extra-wide, high-definition 7-inch touchscreen offers large vehicle and RV settings that map routes based on vehicle height, width, length, and weight. The intelligent navigator will plan routes according to your preferences.


The RoadMate Pro is pre-loaded with U.S. and Canada campground information from Trailer Life Directory, and Good Sam discount locations. It will give you guidance on a million points of interest (POI), pet-friendly parks, RV service centers and parking.

And, the device comes with a Heavy Duty Extension Mount that is versatile and designed for vehicles with deep dashboards, like your RV. You can make easy adjustments to get the viewing position that works for you.

Standard trip planning features in this GPS allow you to plan and customize routes in advance to become familiar with the route before driving it. Turn-by-turn spoken directions will let you keep your eyes on the road while driving.

Best of all, with the RoadMate Pro you can quickly navigate to Good Sam certified campgrounds where you can enjoy member discounts.

Is it worth the price?
GPS receivers have come down significantly in price over the last few years. So priced at around $380, this GPS is a little spendy. Good Sam Club members, however, can get a  $20 discount if you buy it from the Trailer Life Directory Travel Store. What sets this unit apart is definitely the integrated RV points of interest. If you already have a GPS, then you'll have to determine if the price is right for you. However, if you're in the market for an upgrade, then this may be a GPS to consider.

Trailer Life Directory iPhone App (Just released on July 21)
Finally, if you have an iPhone and just want the Trailer Life Directory electronically, well you're in luck. Trailer Life just released their new iPhone app called the RV Park Finder.

Woodalls RV and Camping CoPilot iPhone App (Available now)
If you prefer the Woodalls North American Campground Directory, then there is already an iPhone app for that. Read more about it here.

I kind of like to know where I'm going, but sometimes it's nice to just see what's around the next turn and go where the road takes you. I like to say "No matter where you go, then there you are." And my wife would say "You don't know where you're going. Do you?" So I now have a GPS.

~T
Read full article »

Say "hello" to my little gnome


Thanks to my daughter, I am now the proud owner of my own little Travelocity Gnome. On our first RV trip to Vegas I had to have my picture taken next to the Gnome at the mall. Since then (4 years ago) she's been searching for one for me.

I can't wait to take him out on the road.

~T
Read full article »

Woodall's RV & Camping Copilot Mobile App


Are you tired of lugging around the Woodall's North American Campground Directory with you on a trip? If you have an iPhone, iPad or iPod Touch, you can use Woodall's new mobile app called the RV & Camping Copilot.

The new app from Woodall's (Camping World Company) is FREE on iTunes and offers one-touch access to nearly 12,000 campgrounds in the United States and Canada. It gives you instant access to campground amenities, services, on-site recreation, park discounts and a trusted consumer rating system.

Android?
If you are like me and have an Android smart phone, don't worry. They told me that a droid version will be coming later in the year and will have even more features.


What about the Trailer Life Directory (updated 7/21)?
If you are a Good Sam member (like me) and prefer the Trailer Life Directory instead, try out the Trailer LIfe RV Park Finder for iPhone (released on July 21st).

Will the mobile apps replace the hard copy directory? I hope not. Personally I like looking through the book. Then again I also like my smart phone. With the smart phone's built in GPS and geo locate features, I can really see how the mobile version of the directory could be really handy...especially when you're on the road looking for a place to spend the night.

Have you tried out the RV & Camping Copilot? If you have, then leave a comment to let us know what you think.

Visit my mobile apps page for more handy RV travel apps.

~T
Read full article »

Finished installing my anti sway bars


I've finished the install of my heavy duty Hellwig anti-sway bars this weekend. I'm sooo excited. 


I have the say that the rear sway bar install was a little tough due the amount of heavy wrenching involved. I was pooped after that one! All of the bolts were locking bolts which required a significant amount of wrench cranking. But I did it!

I was very anxious to test the new bars so I took the RV for a little test drive. Awesome! The difference was very significant. I had become used to the tipping feeling when taking a turn in the RV. Now the RV takes turns like an SUV. Amazing.

I'll be getting my new Bilstein shocks installed this week (hopefully) followed by a front end alignment. Then I'm all set. It will be like driving a totally different RV.

For details check out these two posts:
Part I: Replacing the front anti-sway bar
Part II: Replacing the rear anti-sway bar

~T
Read full article »

RV Suspension Upgrade Part 1 - How to install Hellwig anti sway bars


So what happens when you put a 30+ foot house on a Ford truck chassis, then load it up with people, a generator, water, appliances, furniture, food to last a month, and other stuff? The result is an uneven heavy RV that doesn't handle very well. To accommodate the odd extra loads, the suspension and front tires have to work extra hard to keep the RV stable. This is especially true for longer class-c RVs such as mine.


I've found that many life-long RVers, who have owned multiple RVs, make it a priority to evaluate and improve the suspension components in their RV shortly after buying it. The stock shock absorbers, anti-sway bars and steering stabilizers can all be upgraded to heavy duty components that are better suited for the RV application. The results can be dramatic and make driving your RV a more pleasurable, relaxing and safer experience.


In part one of this two part video, I'll replace my RV's stock front anti-sway bar with a heavy duty upgrade. I chose to go with anti-sway bars from Hellwig for this project. There is no jacking up, drilling or special tools involved. I was able to complete the job using basic wrenches and ratchet hand tools. In a future video post I'll replace the rear anti-sway bar and have my shocks upgraded.

Keep reading: Part II of this project (Replacing the rear anti-sway bar)

Read full article »

LED Replacement Bulbs


Have you thought of replacing your incandescent light bulbs with LED bulbs? I know I've been planning to do so...eventually. What is stopping me? Well...the expense I guess. As many are aware, LEDs last much longer, use much less power and put out very little heat over incandescent bulbs. Considering those factors, the expense seems justified. However, if there is a downside to LEDs, it is that they do not put out a soft beam of light like incandescent bulbs do. LEDs put out a whiter and often brighter beam of light. But when an RV electrical component claims to "last much longer" and "draw much less power", I couldn't resist checking it out.

Check out my live comparison of LED bulbs to Standard bulbs

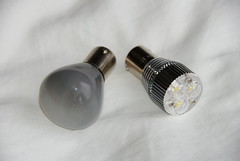
I thought I would start replacing my incandescent bulbs with LEDs as they burn out. I recently replaced two bulbs over my bed. I could not find any comparable bulbs in stores, so I opted to order them online from SuperBrightLEDs.com. I got the cool white ones (part #1156-W3X1W). The new bulbs arrived promptly within a few days. When they arrived, I was pretty excited...don't ask me why. I couldn't wait to plug them in and check them out. The photo above shows the old bulb and the replacement bulb side-by-side.

With the old-bulbs, the light fixture would get extremely hot. In fact, we would often burn our fingers just trying turn the light on and off. The new bulbs put off very little heat and are not hot to the touch at all. To the left is a photo of the fixture with the new LED bulb in it.

Upgrading your light fixtures is a very easy project that any one should be able to take on. If you do a lot of boondocking then you've probably already considered it. All you have to do is pick the right replacement LEDs for your light fixture.

Read full article »

Do It Yourself Windshield Chip Repair


You're traveling down the highway having a jolly 'ol time in the RV, then the car in front of you launches a small rock right at you. Have you ever had the experience of watching a little speck get larger and larger until "smack", it hits you square in the windshield. There's nothing to do except cringe when it makes impact. Sound familiar?

Last year, while driving through Utah, a truck kicked up a rock that struck my windshield leaving a noticeable chip. I thought..."Great! I guess I'll have to take the RV back into Novus when I get home. What a pain..." I had taken the RV into Novus the year before for a chip repair and had thoughtfully grabbed a handful of those stickers to place on chips to keep them from spreading. One of those stickers came in handy on this occasion.

Having stared at that sticker on my windshield for the last few months, I felt it was time to take care of that chip. This time, however, I figured I would try to repair it myself. There had to be a way. After all, those "Free Chip Repair" folks who hang around in grocery store parking lots could do it. So I thought there must be a way for me to fix my own windshield. After a few minutes Google-ing "do it yourself chip repair", I found a relatively inexpensive Do It Yourself Windshield Repair Kit on Amazon for under $10. It was the Fix A Windshield Repair Kit and the reviews seemed favorable. I thought "How come I didn't think of this before?" I ordered two kits thinking that I could keep one with me in the RV in case I needed to use it on a trip.

The Repair
Today, I attempted my first repair. After carefully reading the directions, I cleaned the chip area, placed the tube holder over the chip, and followed the instructions to inject the resin into the crack. I had read several of the reviews for this product and picked up a couple tips from other customers. I placed a heat source on the inside of the windshield to allow the resin the spread into the crack easier. Instead of a heat gun or hair dryer, I just used a utility light. Once the crack was filled, the instructions said to expose the car to direct sunlight (or UV light) to bond the resin to the windshield. There's very little sun here this time of year, so I used a simple black light which did the trick.

Success!
I was very satisfied with the result. It was as good or better than other chip repairs I had "paid" $60 for. Using the same kit, I repeated the process for two other windshield chips on our Honda CRV tow vehicle. The result was a "barely" noticeable mark where the ugly chip had been. Each repair took about 30 minutes.

I still have the second kit I purchased, so I'll keep that one in the RV in case I get another chip while on the road. The repair process is easy enough to perform while at the RV park. Try it out for yourself if don't believe me. Once you've repaired a couple of chips on your own, you'll never pay again.

Have you tried this? Tell me how it went.

Read full article »

A gift for the outdoorsman who has everything


I came across this recently and had to share. It's the Off-Road Commode. This has got to be the ultimate receiver hitch accessory for when you just have to go. I'll add...and you're "off-road". I wouldn't want to see anyone using this on the side of the highway. It comes in camouflage as if the white of your butt cheeks wouldn't give you away. Anyway you'll have to leave your modesty in the truck if you plan on breaking this puppy out on your next camping trip. It should come with a bumper sticker that reads "Warning! Dropped Load". And if you're a big fella (or woman), you'll be glad to know that it supports up to 500 pounds of...well you know what.  :)
Read full article »

Tear drop


Tear drop
Originally uploaded by RVWithTito
This was a cute little tear drop travel trailer. It has lots of creature comforts in a compact unit. The only thing missing was a toilet. Nevertheless, it would be an eye catcher at any campsite.
Read full article »
Related Posts Plugin for WordPress, Blogger...